How to Create Irresistible Clear Toy Candy: A Step-by-Step Clear Toy Candy Recipe
#### Clear Toy Candy RecipeClear toy candy, also known as transparent candy or sugar glass, is a delightful treat that captivates both children and adults a……
#### Clear Toy Candy Recipe
Clear toy candy, also known as transparent candy or sugar glass, is a delightful treat that captivates both children and adults alike. This unique candy is not only visually appealing but also offers a fun and interactive experience when making it at home. In this guide, we will explore a detailed clear toy candy recipe that you can easily follow, along with tips and tricks to achieve the perfect result.
#### Ingredients for Clear Toy Candy
To start your journey into the world of clear toy candy, you will need the following ingredients:
- 2 cups of granulated sugar
- 1 cup of corn syrup
- 1/2 cup of water
- Food coloring (optional, for added fun)
- Flavoring extracts (optional, such as vanilla or peppermint)
- Candy thermometer
- A heat-resistant mold (silicone molds work great)

#### Equipment Needed
In addition to the ingredients, you will need some kitchen equipment to help you create your clear toy candy:
- A heavy-bottomed saucepan
- A candy thermometer
- A wooden spoon or spatula
- A heatproof surface for cooling the candy
- A sharp knife or candy cutter for shaping
#### Step-by-Step Instructions

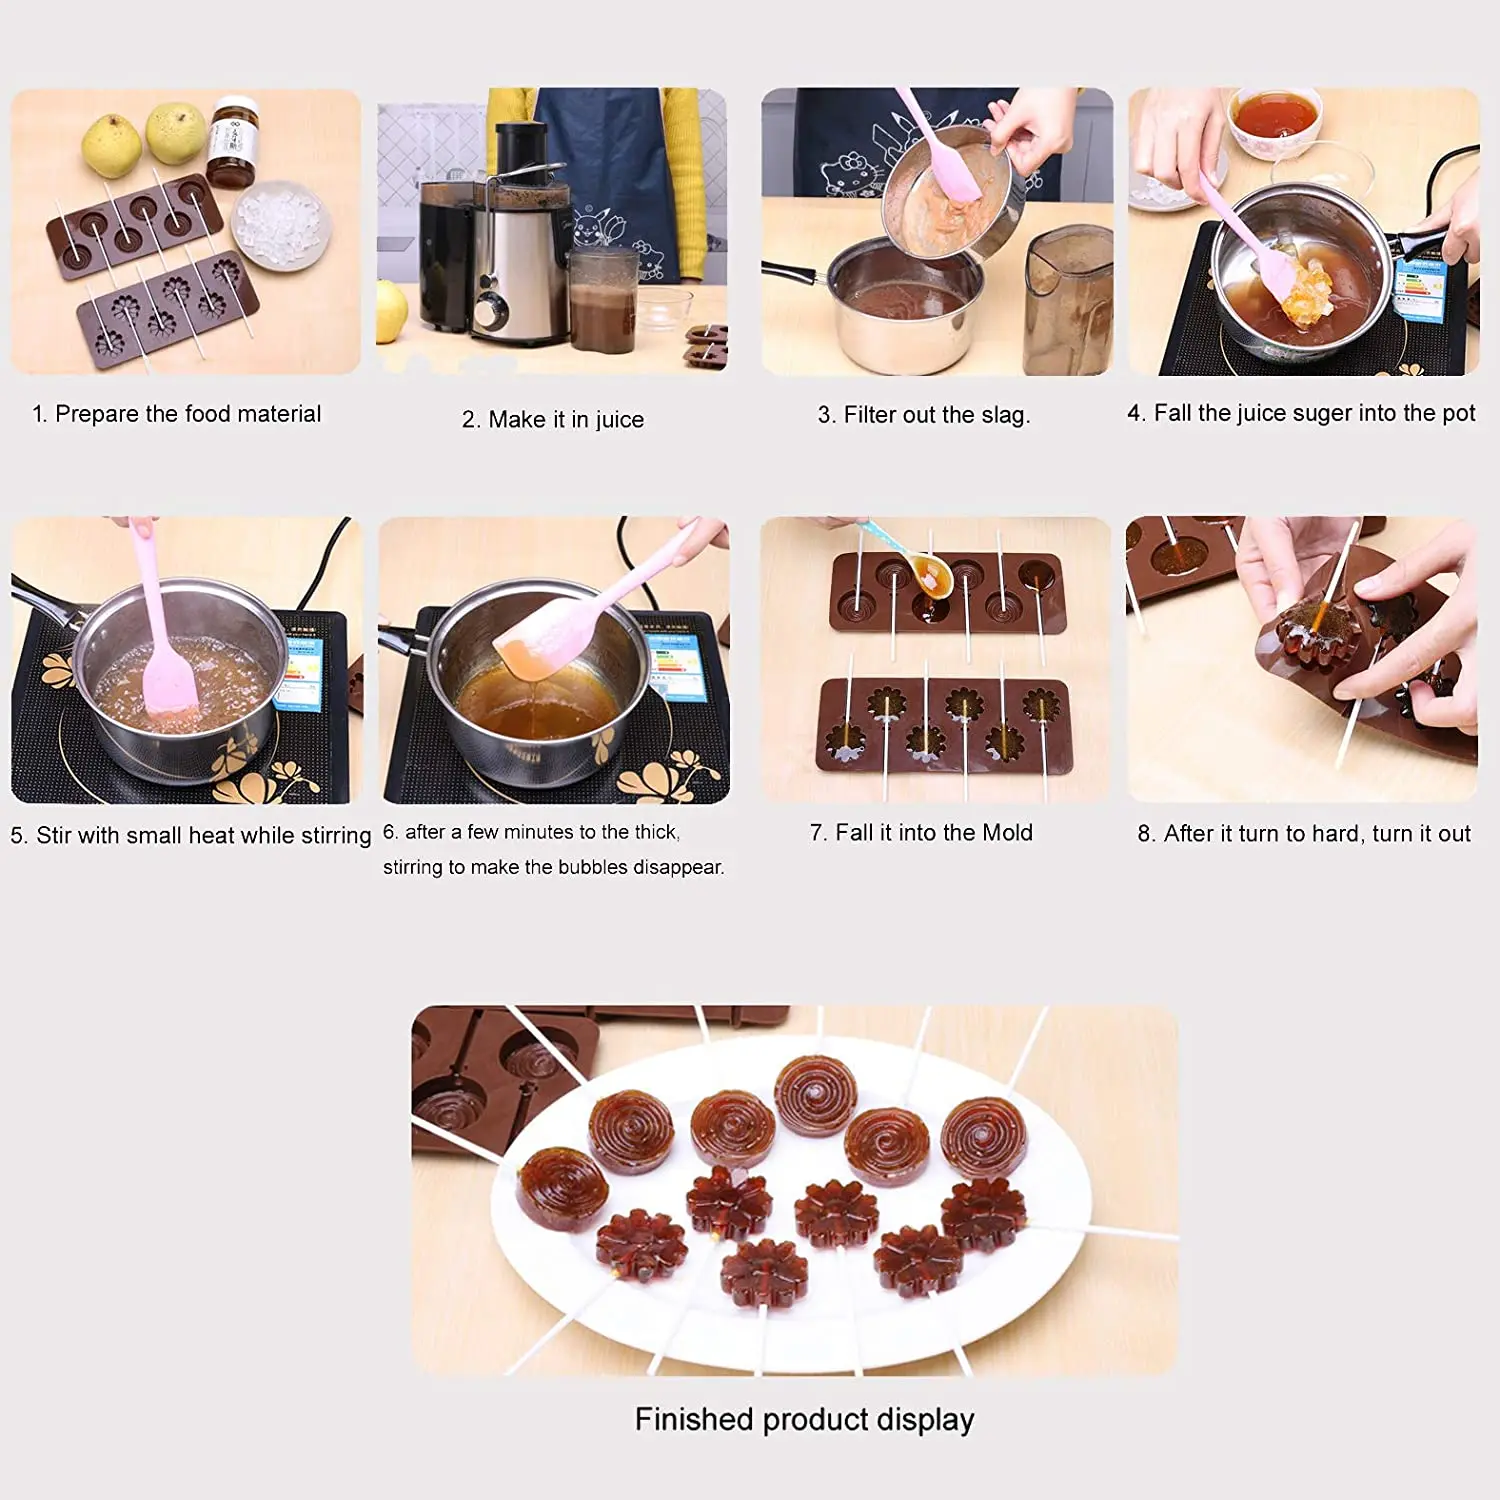
1. **Prepare Your Workspace**: Start by setting up your workspace. Make sure your molds are clean and dry. If you wish to use food coloring or flavoring, have them ready.
2. **Combine Ingredients**: In your heavy-bottomed saucepan, combine the granulated sugar, corn syrup, and water. Stir the mixture gently to combine.
3. **Heat the Mixture**: Place the saucepan over medium heat and bring the mixture to a boil. Do not stir once it starts boiling, as this can cause crystallization. Use your candy thermometer to monitor the temperature.
4. **Reach the Right Temperature**: Allow the mixture to boil until it reaches 300°F (150°C), which is the hard crack stage. This is crucial for achieving that clear, glass-like finish.
5. **Add Color and Flavor**: Once the mixture reaches the desired temperature, remove it from the heat. If you want to add color or flavor, now is the time. Stir gently to incorporate.
6. **Pour into Molds**: Carefully pour the hot candy mixture into your prepared molds. Be cautious, as the mixture will be extremely hot. Allow it to cool at room temperature until it hardens completely.
7. **Unmold and Enjoy**: Once the candy has cooled and hardened, gently remove it from the molds. If desired, you can cut the candy into shapes or pieces using a sharp knife.
#### Tips for Success

- **Temperature Control**: Use a reliable candy thermometer to ensure you reach the correct temperature. If the mixture is undercooked, it will be sticky; if overcooked, it may burn.
- **Experiment with Flavors**: Don’t hesitate to experiment with different flavor extracts and food colorings to create unique combinations that suit your taste.
- **Storage**: Store your clear toy candy in an airtight container to keep it fresh and prevent it from becoming sticky.
#### Fun Ideas for Clear Toy Candy
Once you've mastered the basic clear toy candy recipe, you can get creative! Consider using molds in fun shapes, adding edible glitter for sparkle, or even creating layered colors for a stunning visual effect. Clear toy candy can also be used as a decorative element for cakes and desserts, making it a versatile addition to your candy-making repertoire.
In conclusion, making clear toy candy is a fun and rewarding experience that allows you to unleash your creativity in the kitchen. With this clear toy candy recipe, you can impress friends and family with your candy-making skills. Enjoy the process, and most importantly, have fun tasting your delicious creations!